

Introduction
Overview of DIY Natural Beauty Masks for Glowing Skin
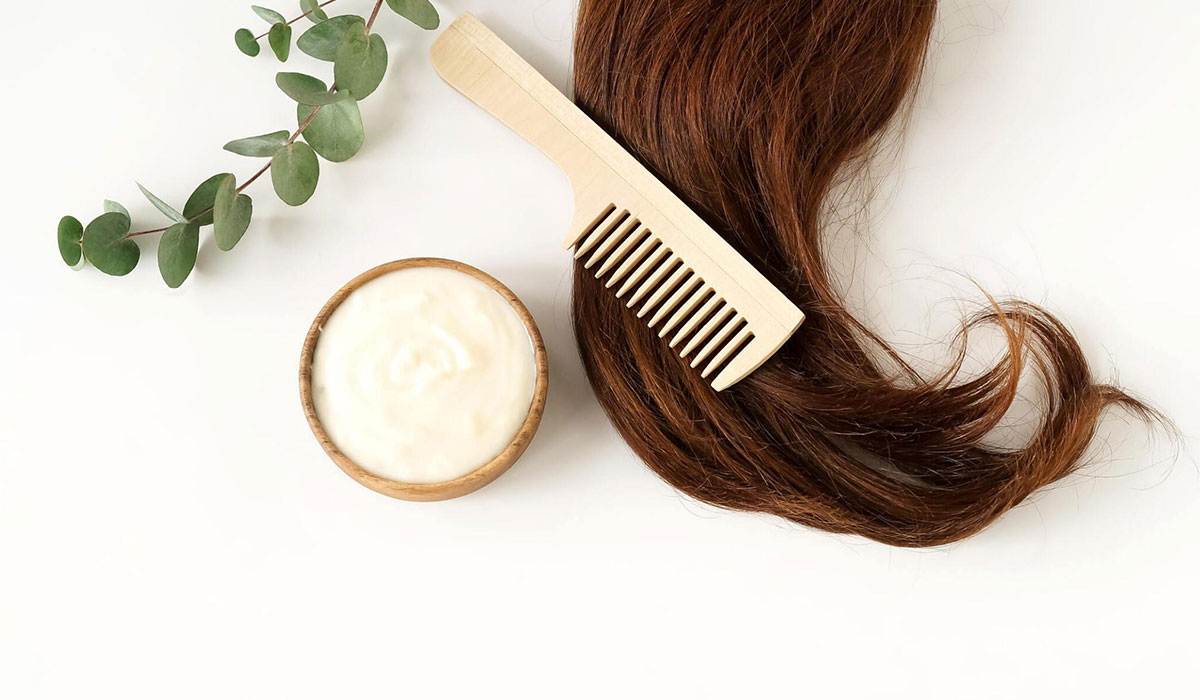
DIY face masks have become increasingly popular, especially during the pandemic when going to a spa or salon may not have been possible. These homemade masks are not only satisfying to make but also offer practical benefits for your skin. By incorporating DIY face masks into your skincare routine, you can revitalize and rejuvenate your skin, helping it regain its natural glow. With the right combination of natural ingredients, you can create masks that are convenient, cost-effective, and nourishing for your skin.
Why DIY Masks are Beneficial for the Skin
1. Convenience: DIY face masks can be prepared using ingredients readily available in your kitchen or pantry. You don’t have to worry about scheduling appointments or spending extra time traveling to a spa or salon.
2. Cost-effectiveness: Creating your own face masks at home is much more affordable than purchasing expensive skincare products. Natural ingredients like fruits, vegetables, and pantry staples can provide similar benefits to commercial products without the high price tag.
3. Customization: DIY masks allow you to tailor the ingredients to your specific skin needs. Whether you have oily, dry, or sensitive skin, you can choose ingredients that address your concerns and provide the desired results. This customization ensures that you are giving your skin exactly what it needs.
4. Nutritional Benefits: Natural ingredients are packed with vitamins, minerals, and antioxidants that can nourish and improve the health of your skin. DIY face masks allow you to harness the power of these ingredients, providing your skin with the essential nutrients it needs for a radiant glow.
5. Control over Ingredients: When you make your own face masks, you have complete control over the quality and purity of the ingredients used. You can avoid potentially harmful chemicals or allergens that may be present in commercial products.
6. Relaxation and Mindfulness: The process of creating and applying a DIY face mask can be a therapeutic and relaxing experience. Taking time for self-care and pampering your skin can promote a sense of well-being and mindfulness.
In conclusion, incorporating DIY face masks into your skincare routine can have numerous benefits for your skin. From convenience and cost-effectiveness to customization and nutritional benefits, these masks offer a natural and effective way to achieve a glowing complexion. So why not give it a try and indulge in some self-care with homemade face masks that will leave your skin looking and feeling rejuvenated.
Turmeric and Honey Mask
Preparation and ingredients of the turmeric and honey mask
To create the turmeric and honey mask, you will need the following ingredients:
– 1 teaspoon of turmeric powder
– 1 tablespoon of raw honey
Simply mix the turmeric powder and raw honey together in a small bowl until they form a smooth paste. Adjust the quantities as needed to achieve the desired consistency.
Application and removal process
– Start by cleansing your face with a mild cleanser and pat dry with a soft towel.
– Using clean fingers or a brush, apply a thin layer of the turmeric and honey mask onto your face, avoiding the eye area.
– Allow the mask to sit for about 15-20 minutes, or until it has completely dried.
– Gently rinse off the mask with lukewarm water, using gentle circular motions to exfoliate your skin.
– Follow up with your regular moisturizer to lock in hydration and nourish your skin.
**Benefits of the turmeric and honey mask:**
– Turmeric has powerful anti-inflammatory properties that can help reduce redness and inflammation on the skin.
– It also has antioxidant properties, which can help protect the skin from environmental damage and premature aging.
– Honey is known for its antibacterial properties, making it an excellent ingredient for acne-prone skin.
– It can help moisturize and hydrate the skin, leaving it soft and supple.
– The combination of turmeric and honey can help brighten the complexion and improve overall skin tone.
**Cautions:**
– Turmeric has a vibrant yellow color, which can temporarily stain your skin. To prevent this, you can apply a thin layer of oil (such as coconut or olive oil) onto your face before applying the mask.
– If you have sensitive skin, it’s a good idea to do a patch test before applying the mask to your entire face to make sure you don’t have any adverse reactions.
**Conclusion:**
The turmeric and honey mask is a simple yet effective DIY face mask that can help improve the appearance of your skin. By using natural ingredients like turmeric and honey, you can nourish and pamper your skin without the need for harsh chemicals. Incorporate this mask into your weekly skincare routine for a glowing complexion.
Matcha Green Tea and Honey Mask
Ingredients required for the matcha green tea and honey mask
To make the matcha green tea and honey mask, you will need the following ingredients:
– 1 tablespoon of matcha green tea powder
– 1 tablespoon of raw honey
– 1 tablespoon of baking soda
– Water
Steps to make and apply the mask
1. In a small bowl, mix the matcha green tea powder, raw honey, and baking soda together until well combined.
2. Gradually add water to the mixture and stir until a thick paste is formed. Adjust the amount of water as needed to achieve a spreadable consistency.
3. Once the mask is ready, cleanse your face with a gentle cleanser and pat it dry with a towel.
4. Using clean fingers or a brush, apply a thin and even layer of the matcha green tea and honey mask to your face, avoiding the eye area.
5. Allow the mask to sit on your skin for about 15-20 minutes, or until it starts to dry.
6. Gently rinse off the mask with warm water, massaging in circular motions to exfoliate your skin.
7. Follow up with your regular moisturizer to keep your skin hydrated and nourished.
**Benefits of the matcha green tea and honey mask:**
– Matcha green tea is rich in antioxidants, which can help protect the skin from free radicals and environmental damage.
– It also has anti-inflammatory properties that can soothe irritated skin and reduce redness.
– Honey, with its antibacterial properties, can help fight acne-causing bacteria and prevent breakouts.
– Baking soda acts as a mild exfoliant, helping to remove dead skin cells and unclog pores.
– Together, these ingredients can leave your skin feeling refreshed, moisturized, and glowing.
**Cautions:**
– It’s essential to do a patch test before applying the mask to your entire face, especially if you have sensitive skin or are allergic to any of the ingredients.
– Avoid using the mask if you notice any irritation or discomfort during or after application.
– As with any DIY skincare product, it’s also important to use fresh and high-quality ingredients to maximize the effectiveness of the mask.
Incorporating the matcha green tea and honey mask into your skincare routine can help improve the overall appearance and health of your skin. Enjoy the soothing and rejuvenating benefits of this natural, homemade face mask on a regular basis for a glowing and radiant complexion.
Nutmeg and Clay Mask
Combining nutmeg and clay for a soothing mask
Another excellent DIY face mask recipe that can help improve your skin’s appearance is the nutmeg and clay mask. This mask combines the soothing properties of nutmeg with the detoxifying effects of clay, resulting in a rejuvenating treatment for your skin.
To prepare the nutmeg and clay mask, you will need the following ingredients:
– 1 teaspoon of nutmeg powder
– 1 tablespoon of bentonite clay
– 1 tablespoon of water or apple cider vinegar
In a small bowl, mix the nutmeg powder and bentonite clay together. Slowly add water or apple cider vinegar to the mixture until you achieve a smooth paste consistency. Adjust the quantities as needed.
Instructions on how to apply and remove the mask
– Start by cleansing your face with a gentle cleanser and patting it dry with a towel.
– Using clean fingers or a brush, apply a thin, even layer of the nutmeg and clay mask to your face, avoiding the sensitive eye area.
– Allow the mask to dry for approximately 10-15 minutes.
– Rinse off the mask with lukewarm water, using gentle circular motions to exfoliate your skin.
– Pat your face dry and follow up with a moisturizer to keep your skin hydrated.
**Benefits of the nutmeg and clay mask:**
– Nutmeg contains anti-inflammatory and antimicrobial properties, which can help reduce redness and acne-causing bacteria on the skin.
– It can also exfoliate the skin, removing dead skin cells and promoting a smoother complexion.
– Bentonite clay is known for its ability to draw out impurities and toxins from the skin, leaving it refreshed and revitalized.
– It can help control excess oil production and tighten pores, making it beneficial for those with oily or acne-prone skin.
**Cautions:**
– Nutmeg may cause skin irritation in some individuals, so it’s important to do a patch test before applying the mask to your entire face.
– If you experience any discomfort or allergic reactions, such as itching or redness, remove the mask immediately and rinse your face with water.
– Avoid using metal utensils or containers when mixing the mask, as they can react with the clay and reduce its effectiveness.
Incorporating the nutmeg and clay mask into your skincare routine can help rejuvenate your skin and improve its overall health. The combination of nutmeg and clay provides a powerful yet gentle treatment that can benefit a variety of skin types. Give this DIY face mask a try and see the transformative effects on your skin.
Egg Yolk, Honey, and Olive Oil Mask
Mixing egg yolk, honey, and olive oil for a hydrating mask
Another effective DIY face mask recipe to nourish and hydrate your skin is the egg yolk, honey, and olive oil mask. This mask combines the moisturizing properties of egg yolk and honey with the nourishing benefits of olive oil, resulting in a deeply hydrating treatment for your skin.
To create the egg yolk, honey, and olive oil mask, you will need the following ingredients:
– 1 egg yolk
– 1 tablespoon of honey
– 1 tablespoon of olive oil
In a small bowl, whisk together the egg yolk, honey, and olive oil until well combined. The mixture should have a smooth and creamy consistency.
Application and removal steps for the mask
– Start by cleansing your face with a gentle cleanser and patting it dry with a towel.
– Using clean fingers or a brush, apply a thin, even layer of the egg yolk, honey, and olive oil mask to your face, avoiding the sensitive eye area.
– Allow the mask to sit on your skin for approximately 15-20 minutes.
– Rinse off the mask with lukewarm water, massaging your skin in circular motions to gently exfoliate.
– Pat your face dry and follow up with your regular skincare routine.
**Benefits of the egg yolk, honey, and olive oil mask:**
– Egg yolks are rich in proteins and lecithin, which help to moisturize and nourish the skin, leaving it soft and supple.
– Honey is a natural humectant, meaning it draws moisture into the skin, keeping it hydrated and promoting a healthy glow.
– Olive oil is packed with antioxidants and fatty acids that can help protect the skin from free radicals, reduce inflammation, and provide deep hydration.
**Cautions:**
– If you have any known allergies to eggs or bee products, it is important to avoid using this mask.
– Always perform a patch test before applying the mask to your entire face to check for any potential adverse reactions.
– If you experience any discomfort or irritation, remove the mask immediately and rinse your face with water.
– Avoid using excessive amounts of olive oil in the mask, as it may leave your skin feeling greasy.
Including the egg yolk, honey, and olive oil mask in your skincare routine can provide your skin with intense hydration and nourishment. This DIY face mask is suitable for most skin types and can help improve the overall health and appearance of your skin. Give it a try and enjoy the benefits of this natural and effective treatment.
Aloe Rosemary Mask
Ingredients needed for the aloe rosemary mask
To create an aloe rosemary mask for glowing skin, you will need the following ingredients:
– 1 tablespoon of fresh aloe vera gel
– 1 teaspoon of dried rosemary leaves
– 1 teaspoon of honey
– 1 teaspoon of olive oil
Process of creating and applying the mask
1. Start by crushing the dried rosemary leaves into a fine powder.
2. In a small bowl, mix the crushed rosemary, aloe vera gel, honey, and olive oil until well combined.
3. If the mixture seems too thick, you can add a little bit of water to achieve a spreadable consistency.
4. Cleanse your face with a gentle cleanser and pat it dry with a towel.
5. Using clean fingers or a brush, apply a thin, even layer of the aloe rosemary mask to your face, avoiding the eye area.
6. Allow the mask to sit on your skin for about 15-20 minutes.
7. Rinse off the mask with lukewarm water and gently pat your face dry.
8. Follow up with your favorite moisturizer to lock in hydration.
**Benefits of the aloe rosemary mask:**
– Aloe vera gel is known for its soothing and hydrating properties. It can help calm irritated skin, reduce inflammation, and provide a boost of moisture.
– Rosemary is rich in antioxidants that help protect the skin from free radicals and promote a youthful, radiant complexion.
– Honey is a natural humectant, meaning it helps attract and retain moisture in the skin. It also has antibacterial properties that can reduce acne-causing bacteria.
– Olive oil is a nourishing and moisturizing ingredient that helps soften and hydrate the skin.
**Cautions:**
– If you have sensitive skin, it’s recommended to do a patch test before applying the mask to your face to check for any adverse reactions.
– Avoid applying the mask directly to any open wounds or cuts on your skin.
– If you experience any discomfort or irritation while wearing the mask, remove it immediately and rinse your face with water.
The aloe rosemary mask is a wonderful DIY treatment that can help revive dull skin and leave it looking glowing and refreshed. The combination of aloe vera, rosemary, honey, and olive oil provides multiple benefits for various skin types. Give this mask a try and enjoy the nourishing and rejuvenating effects it can have on your complexion.
Benefits of Using Natural Beauty Masks
Exploring the benefits of using natural ingredients on the skin
Using natural beauty masks can be incredibly beneficial for your skin. Here’s why:
1. **Gentle on the skin**: Natural ingredients are generally gentle and less likely to cause irritation or allergic reactions compared to synthetic chemicals often found in commercial skincare products.
2. **No harmful chemicals**: Many commercial beauty products contain harsh chemicals that can be harmful to the skin and overall health. Using natural masks allows you to avoid these harmful ingredients and provide your skin with healthier alternatives.
3. **Rich in antioxidants**: Natural ingredients such as aloe vera, rosemary, and honey are packed with antioxidants. Antioxidants help protect your skin from free radicals, which can cause premature aging and damage.
4. **Moisturizing properties**: Natural ingredients like aloe vera and olive oil are excellent moisturizers. They help hydrate the skin, leaving it soft, supple, and radiant.
5. **Soothing and calming effects**: Many natural ingredients have soothing and calming properties that can help calm irritated and inflamed skin. This is particularly beneficial for those with sensitive or acne-prone skin.
How these masks contribute to glowing skin
Natural beauty masks, like the aloe rosemary mask mentioned earlier, can contribute to glowing skin in several ways:
1. **Nourishment**: Natural masks deliver essential nutrients directly to your skin. These nutrients help nourish and revitalize your skin cells, giving you a healthy and radiant complexion.
2. **Exfoliation**: Some natural masks contain ingredients like oats or sugar, which can gently exfoliate the skin. Exfoliation helps remove dead skin cells, revealing fresh and glowing skin underneath.
3. **Hydration**: Hydration is key for achieving a radiant complexion. Natural ingredients such as aloe vera and honey are excellent natural moisturizers, helping to hydrate and plump the skin.
4. **Unclogging pores**: Natural masks can also help unclog pores, eliminating dirt, oil, and impurities that can dull the skin. This deep cleansing action promotes a clearer and more radiant complexion.
5. **Promoting cell turnover**: Some natural ingredients, like rosemary, can help promote cell turnover. This means that new, healthy skin cells are generated faster, leading to a more youthful and radiant appearance.
Incorporating natural beauty masks into your skincare routine allows you to take a proactive approach in achieving and maintaining a glowing and healthy complexion. It’s important to remember that consistency is key. Regular use of natural masks, combined with a good skincare routine and a healthy lifestyle, can help you achieve the best results. So why not give these DIY face masks a try and see the amazing benefits they can have on your skin?
Tips for Better Results
Tips and tricks to enhance the effectiveness of the masks
Here are some tips to maximize the results of your DIY face masks:
1. Cleanse your face thoroughly before applying the mask to remove any dirt, oil, or makeup. This ensures that the mask can penetrate deeply into your skin.
2. Exfoliate your skin gently before using the mask to remove dead skin cells and unclog pores. This allows the mask to work more effectively.
3. Steam your face before applying the mask to open up your pores. This helps the mask ingredients to penetrate deeper into your skin.
4. Use organic and high-quality ingredients for your face masks to ensure that you are getting the maximum benefits for your skin.
5. Apply the mask in an even layer and avoid applying it too close to your eyes or mouth.
6. Relax while wearing the mask and try to leave it on for the recommended time to allow the ingredients to work their magic.
7. Use the mask regularly to see the best results. Incorporate it into your skincare routine at least once or twice a week.
Common mistakes to avoid during the application process
To ensure that your DIY face masks work effectively and give you the desired results, avoid these common mistakes:
1. Avoid leaving the mask on for too long as it can dry out your skin and cause irritation. Follow the recommended time mentioned in the recipe.
2. Do not mix too many ingredients together as it can make the mask ineffective and lead to skin reactions.
3. Avoid using ingredients that you are allergic to or that have caused irritation in the past.
4. Do not apply the mask on broken or irritated skin, as it can exacerbate the condition.
5. Avoid rubbing or scrubbing your face vigorously while applying or removing the mask, as it can cause redness and irritation.
6. Do not apply the mask in a thick layer, as it can take longer to dry and may not provide the desired benefits.
7. Avoid using hot water to rinse off the mask, as it can strip away the natural oils from your skin.
By following these tips and avoiding common mistakes, you can enhance the effectiveness of your DIY face masks and achieve glowing, radiant skin. Experiment with different recipes and find the ones that work best for your skin type and concerns. Enjoy the process of pampering your skin with natural ingredients and revel in the results.
Summary of the DIY natural beauty masks for glowing skin
In summary, DIY face masks are a convenient and economical way to rejuvenate your skin and bring back its natural glow. By using organic and high-quality ingredients, cleansing and exfoliating your skin beforehand, and applying the masks regularly, you can achieve better results. Remember to avoid common mistakes such as leaving the mask on for too long or using ingredients that may cause irritation. With these tips, you can enhance the effectiveness of the masks and achieve a radiant complexion.
Encouragement to try these masks for a radiant complexion
If you haven’t tried DIY face masks yet, now is the time to give them a go. With the wide variety of mask recipes available, you can find the perfect one for your skin type and specific skin concerns. Whether you want to hydrate, brighten, or tighten your skin, there is a DIY mask out there for you. So, take some time for self-care, gather the ingredients, and treat yourself to a rejuvenating and relaxing mask session. Your skin will thank you for it, and you’ll love the results that these DIY masks can provide. Get ready to glow and enjoy the benefits of natural ingredients for a radiant complexion.